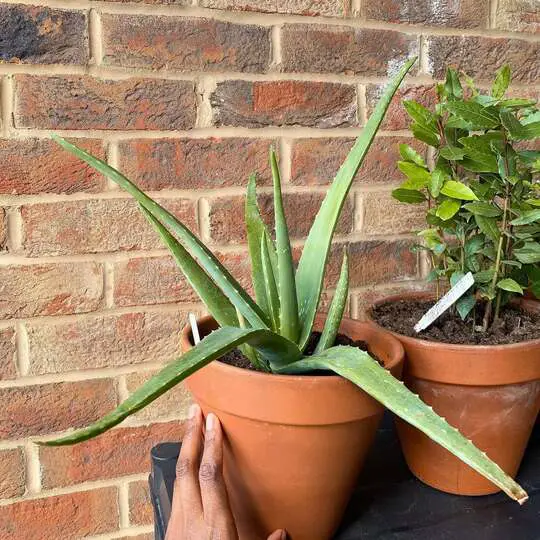
Repotting is an essential part of aloe vera care, especially when your plant outgrows its current container or the soil becomes compacted. Knowing how to repot aloe vera properly helps ensure strong root development, better drainage, and a healthier plant overall. This simple task can make a big difference in the long-term vitality of your aloe.
Aloe vera is a hardy succulent, but even the toughest plants benefit from fresh soil and more space to grow. Whether your plant is root-bound or showing signs of stress, repotting gives it a fresh start. Let’s walk through the key steps to do it right.

Why Repot Aloe Vera?
Repotting aloe vera is not just about aesthetics; it’s a critical part of plant maintenance that ensures long-term health and vitality. Over time, the soil in containers becomes compacted, depletes nutrients, and retains too much moisture—all of which can harm aloe vera, a plant that thrives in well-draining, dry conditions.
One of the most common reasons to repot is root crowding. Aloe vera has a fibrous root system that expands steadily. When roots become bound or circle the bottom of the pot, they lose access to air and nutrients. Repotting allows them room to spread and function effectively.
Other key reasons include:
- Soil degradation: Old potting mix may become too dense or lose its drainage capability.
- Root rot prevention: If the plant sits in wet, poorly draining soil, rot can set in quickly.
- Offset removal: Repotting is the ideal time to separate and replant baby aloes (pups).
Regular repotting every 1–2 years helps keep aloe vera thriving by refreshing the soil and maintaining healthy root growth. It also gives you a chance to inspect the roots and address any hidden issues.
When to Repot Aloe Vera
Timing is key when deciding when to repot aloe vera. While these hardy succulents don’t need frequent repotting, certain signs indicate it’s time to give your plant a new home. Watching for these cues ensures your aloe stays healthy and continues to grow strong.
The best time to repot aloe vera is in the spring or early summer, when the plant is entering its active growing phase. Repotting during this period helps reduce transplant shock and encourages quicker recovery. Avoid repotting in the winter, when the plant is dormant and more vulnerable to stress.
Look for these signs:
- Roots coming out of the drainage holes
- Soil dries out too quickly or remains soggy
- Leaves look crowded or top-heavy
- Presence of baby plants (offsets) needing space
In general, plan to repot aloe vera every 1 to 2 years, depending on growth rate and pot size. Frequent checks help you catch problems like compacted soil or declining drainage before they impact the plant’s health. Being proactive about timing makes the repotting process smoother and more beneficial.
Choosing the Right Pot for Repotting
Selecting the right pot is a critical step in learning how to repot aloe vera effectively. The container you choose can significantly affect the plant’s drainage, root development, and overall health. A poor choice could lead to water retention, root rot, or stunted growth.
Material matters. Terracotta or unglazed clay pots are ideal because they’re porous, allowing excess moisture to evaporate. This helps mimic the dry conditions aloe vera prefers. Plastic pots, while lightweight and inexpensive, retain more water and should be used only with excellent drainage setups.
Key features to look for:
- Drainage holes: Non-negotiable for aloe vera. They prevent water from pooling at the bottom.
- Size: Choose a pot that’s 1–2 inches wider than the current one. Oversized pots hold too much moisture, which increases rot risk.
- Shape: A shallow, wide pot is often better than a deep one, as aloe’s roots tend to spread outward rather than downward.
Avoid decorative pots without drainage unless you use them as a sleeve over a functional inner pot. The right container provides a balance of space, airflow, and moisture control to support a thriving aloe vera plant.
Selecting the Ideal Soil
Choosing the right soil is just as important as picking the right pot when learning how to repot aloe vera. Aloe vera is a succulent, meaning it thrives in fast-draining, low-moisture environments. The wrong soil can retain too much water, leading to root rot and poor plant health.
Avoid using regular potting soil, which is often too dense and moisture-retentive for succulents. Instead, go for a succulent or cactus mix, which contains the right balance of ingredients for drainage and aeration. These mixes typically include sand, perlite, pumice, or small gravel to allow excess water to escape quickly.
Ideal soil mix components:
- Coconut coir or peat moss for light moisture retention
- Coarse sand or perlite for airflow and drainage
- Compost or organic matter in small amounts for nutrients
You can also make your own blend by combining 2 parts potting soil, 1 part coarse sand, and 1 part perlite or pumice. This ensures your aloe gets the well-drained environment it needs. Using the correct soil supports root health and helps your aloe vera adapt smoothly after repotting.
Step-by-Step Guide to Repotting Aloe Vera
Successfully learning how to repot aloe vera starts with understanding each step of the process. While aloe is a tough plant, handling it gently and methodically during repotting will reduce stress and promote healthy regrowth.
1. Prepare your materials
Before starting, gather everything you’ll need:
- A new pot with drainage holes
- Fresh succulent or cactus soil
- Gloves (optional, but aloe leaves can be sharp)
- A clean trowel or spoon
2. Remove the aloe vera from its old pot
Gently loosen the soil and grip the base of the plant. Tilt the pot and slide the aloe out. If the roots are stuck, tap the sides or use a trowel to free them. Shake off excess soil and inspect the roots, trimming any that are brown, mushy, or dead.
3. Replant in the new pot
Add a layer of fresh soil to the bottom of the new pot. Center the aloe and fill around it with soil, ensuring it sits upright and stable. Leave about an inch of space below the rim to make watering easier.
Let the plant sit for a few days before watering to allow root wounds to heal, preventing rot.
Post-Repotting Care
After repotting, aloe vera needs a bit of special attention to ensure it settles into its new environment successfully. While this succulent is low-maintenance, the post-repotting phase is crucial for minimizing stress and promoting healthy growth.
Hold off on watering. One of the most common mistakes is watering immediately after repotting. Aloe vera’s roots may have been disturbed or trimmed, and adding moisture too soon can lead to rot. Wait 5 to 7 days before the first watering to allow roots to callous and heal.
Place in indirect light. Avoid intense sun during the first few days post-repotting. Move the plant to a bright but shaded area where it can recover without the stress of harsh UV exposure. After a week, return it to its usual sunny spot.
Monitor for signs of stress:
- Wilting or drooping leaves
- Yellowing or browning at the base
- Soft or mushy spots
These issues usually resolve as the plant acclimates. Avoid fertilizing for at least a month, as fresh soil contains enough nutrients. With a little patience and care, your repotted aloe vera will bounce back stronger and healthier.
Monitoring Aloe Vera After Repotting
Even after successful repotting, keeping an eye on your aloe vera is essential to ensure it adapts well to its new pot and soil. The weeks following the move are critical for detecting any early signs of stress or problems that could affect long-term health.
Check soil moisture regularly. While aloe vera is drought-tolerant, newly repotted plants should be observed more closely. Ensure the soil is drying out between waterings. Overwatering at this stage is the most common mistake and can quickly lead to root rot.
Observe leaf condition and color:
- Firm, green leaves indicate healthy recovery.
- Wrinkled or drooping leaves can mean the roots haven’t settled or absorbed water yet.
- Yellowing or browning may signal stress, often from light or water issues.
Tips for healthy monitoring:
- Keep the plant in indirect sunlight during the first two weeks.
- Avoid fertilizing for at least four weeks.
- Rotate the pot occasionally for even light exposure.
Monitoring doesn’t mean micromanaging—just stay aware of your plant’s appearance and the moisture levels. Subtle changes can help you catch issues early and support a thriving aloe vera post-repotting.
Troubleshooting Repotting Issues
Even with careful preparation, problems can arise after repotting aloe vera. Recognizing the signs early and taking corrective action can prevent minor issues from becoming serious setbacks for your plant’s health.
Common post-repotting problems:
- Wilting or drooping leaves: This can be normal in the first few days, but prolonged wilting may indicate overwatering or root damage. Let the soil dry out completely before watering again.
- Yellowing or browning leaves: Often caused by poor drainage or sun shock. Make sure your pot has drainage holes and move the plant to a less intense light environment if needed.
- Mushy or foul-smelling roots: A sign of root rot, likely from excess moisture. Remove the plant, trim off damaged roots, and repot in dry, fresh soil.
Preventative tips:
- Always use a well-draining cactus or succulent mix.
- Wait 5–7 days before watering after repotting.
- Ensure the new pot is only slightly larger to avoid moisture retention.
Patience and observation are key. Aloe vera is resilient, and with a little care, most repotting issues can be resolved quickly to restore your plant’s health.
Final Thoughts
Learning how to repot aloe vera properly can greatly improve the health and longevity of your plant. From choosing the right pot and soil to providing gentle post-repotting care, every step plays a vital role. While aloe vera is low-maintenance, repotting gives it the fresh foundation it needs to thrive. With patience and attention, your aloe will reward you with vibrant growth and lasting beauty.

I’m Shofi, a passionate gardener and blogger. I have 10+ years of experience in gardening and hold certifications in horticulture and garden design. I share my knowledge and skills through my garden blog to inspire and educate others on the joys of gardening. I try to provide valuable information and create a community for gardeners of all levels to connect and learn. My ultimate goal is to inspire others to start their own gardens and connect with nature.
