
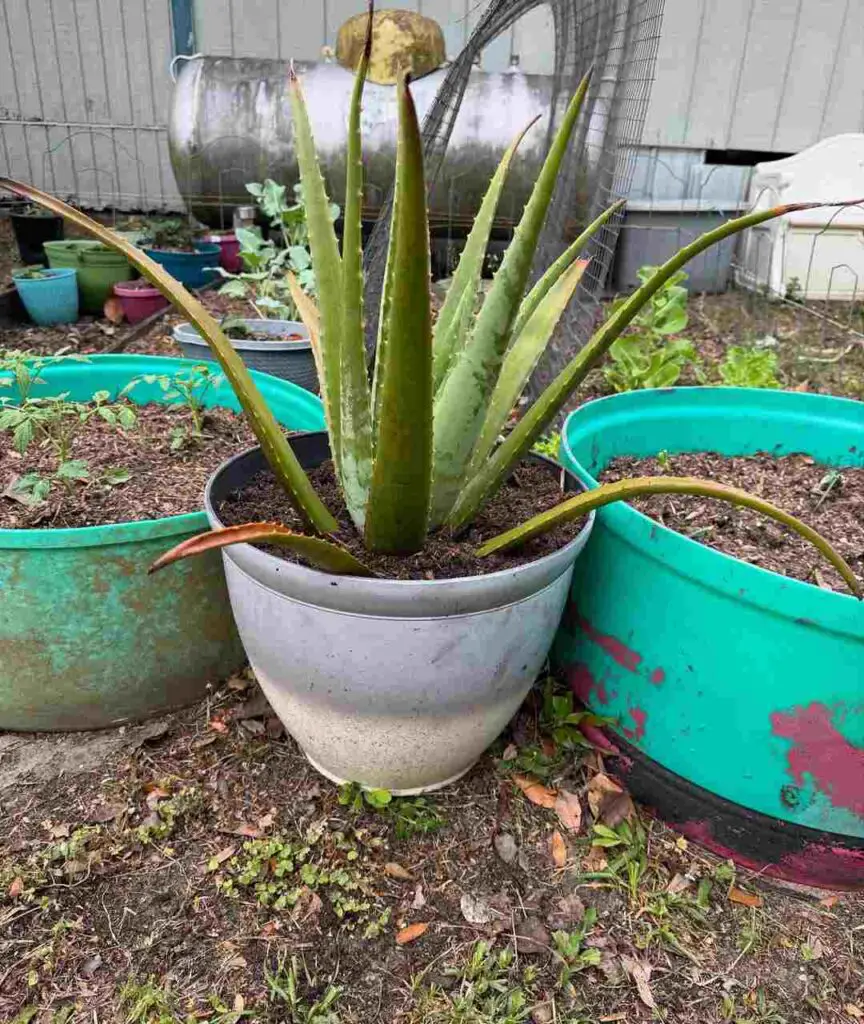
Choosing the right pot for your Aloe Vera is crucial for its growth and overall health. Aloe Vera thrives in a well-draining container that provides the right balance of space and airflow. With the right pot, your Aloe Vera can grow vigorously and stay healthy, avoiding root rot and other issues.
In this article, we’ll explore the best types of pots for Aloe Vera and what you need to look out for when selecting one. By understanding the key factors like material, size, and drainage, you can make an informed decision and give your Aloe Vera the best environment to thrive.
Pot Material: How to Choose the Best for Your Aloe Vera
When selecting a pot for your Aloe Vera, the material plays a significant role in its health. The right material ensures good drainage, temperature regulation, and root health. Let’s look at some of the most popular materials and their benefits:
1. Terracotta Pots
- Breathable: Terracotta is a porous material that allows air to circulate around the roots.
- Great for drainage: The porosity also helps with water drainage, preventing water from sitting around the roots and causing rot.
- Aesthetic appeal: Its natural, rustic appearance adds charm to any indoor or outdoor space.
2. Ceramic Pots
- Non-porous: Unlike terracotta, ceramic pots often come glazed, which means they retain moisture longer.
- Decorative: Available in a variety of designs, they can add an ornamental touch to your decor.
- Heavy: Ceramic pots are typically heavier, so they’re stable but can be harder to move around.
3. Plastic Pots
- Lightweight: Plastic pots are easy to move, which is perfect for those who want flexibility in placement.
- Affordable: These pots are budget-friendly and come in various sizes and styles.
- Less drainage: Most plastic pots don’t offer the same breathability as terracotta or ceramic, but this can be mitigated with additional drainage holes.
Choosing the right material for your Aloe Vera depends on your growing environment, aesthetic preference, and the pot’s functionality. Each material has pros and cons, so consider what fits best for your needs.
Pot Size: How to Choose the Right Size for Your Aloe Vera
Selecting the correct size pot for your Aloe Vera is essential for its growth and health. Too small of a pot can stunt the plant’s growth, while a pot that’s too large can lead to root rot due to excess moisture. Here’s how to find the right balance:
1. The Right Size for Growth
- Avoid over-potting: Aloe Vera plants prefer being slightly root-bound, meaning the roots should fill the pot without being cramped. If the pot is too large, it may take longer for the roots to establish, which could lead to root rot from excess moisture.
- Increase size gradually: Choose a pot that’s just 1-2 inches larger in diameter than the current pot. This will give the roots enough space to grow without being overwhelmed by too much soil.
2. Depth of the Pot
- Consider root depth: Aloe Vera’s roots grow relatively shallow, so a pot with adequate depth is important. A pot that is too deep may retain too much moisture at the bottom, leading to root issues. Aim for a pot that allows the roots to grow outward without excess room below.
3. Potting Frequency
- Repot when necessary: As your Aloe Vera grows, it may eventually need a larger pot. Keep an eye on the plant and move it to a bigger pot when the roots start to outgrow the container. Typically, Aloe Vera plants need repotting every 1-2 years.
By choosing the right size pot, you ensure that your Aloe Vera has enough space for its roots to grow, while avoiding conditions that could lead to waterlogged roots or stunted growth.
Drainage: A Must-Have Feature for Aloe Vera Pots
Proper drainage is one of the most critical factors when selecting a pot for your Aloe Vera. Aloe Vera is a succulent, and like most succulents, it thrives in dry conditions. Without proper drainage, excess water can lead to root rot and other issues. Here’s why drainage is essential:
1. Prevents Waterlogging
- Root rot risk: Aloe Vera plants are susceptible to root rot if they sit in waterlogged soil. Drainage holes at the bottom of the pot allow excess water to escape, ensuring the soil stays dry and aerated.
- Dry, well-drained soil: Aloe Vera prefers its roots to be kept dry between waterings. Good drainage ensures that water doesn’t collect at the base, creating an environment where the roots can breathe.
2. Ensures Healthy Root Growth
- Root health: When water isn’t allowed to pool in the bottom of the pot, the roots grow healthier and stronger. This also prevents the growth of harmful bacteria and mold.
- Faster drying time: With good drainage, the soil dries out faster after watering, preventing overwatering, which can cause stress to the plant.
3. What to Look For
- Drainage holes: Always opt for a pot with at least one large drainage hole. Multiple holes are even better for promoting airflow and water movement.
- Raised base: Some pots come with a raised base or drainage tray that helps keep the soil elevated from the collected water, further preventing root rot.
In short, drainage is not optional for Aloe Vera pots. A pot with good drainage ensures your plant thrives and prevents issues like root rot that can damage your Aloe Vera over time.
Pot Design and Style: How to Match Your Aloe Vera with Your Space
Choosing the right design and style of pot for your Aloe Vera not only benefits the plant but also enhances the aesthetics of your space. Aloe Vera’s striking, geometric shape and vibrant green color can complement various interior or exterior styles. Here’s how to make it work:
1. Matching the Aesthetic of Your Space
- Minimalist Design: Aloe Vera’s clean, sharp lines work well with simple, minimalist pots. Opt for neutral-colored pots like white, gray, or black to maintain a modern, sleek look.
- Rustic and Natural Vibes: Terracotta pots bring out a more rustic, natural feel. If you prefer an earthy look, choose unglazed terracotta for a warm, organic appearance that complements Aloe Vera’s rugged nature.
- Modern & Bold: For a contemporary space, consider bold, colorful pots or those with geometric patterns. Aloe Vera’s natural beauty stands out against vibrant or metallic containers.
2. Choosing the Right Texture
- Smooth vs. Textured: A smooth ceramic or plastic pot adds a polished touch, whereas textured pots (such as rough clay or stone) provide a more earthy, natural feel. Both can complement Aloe Vera, depending on your decor preferences.
- Matte vs. Glossy: Matte pots offer a subtle, understated look, while glossy pots reflect light and add a shiny, high-end feel to your space. Choose based on the overall tone you want for your home.
3. Outdoor vs. Indoor Pot Style
- Indoor Pots: For indoor spaces, choose stylish pots that match your furniture or room design. Small, compact pots are ideal for tabletops, shelves, or windowsills, while larger pots work well as statement pieces on the floor.
- Outdoor Pots: Outdoors, you can go for larger, more durable materials like concrete or stone. These can withstand the elements and provide a more natural look in gardens or patios.
Aloe Vera’s versatility means it can be styled to fit any space, from minimalist modern rooms to cozy, rustic outdoor areas. Choose the pot design and style that best suits your personal taste and enhances your surroundings.
Repotting Aloe Vera: When and How to Do It
Repotting Aloe Vera is an essential part of its care routine, ensuring that it continues to grow and thrive in a healthy environment. Knowing when and how to repot is key to preventing stress on your plant and encouraging optimal growth.
1. When to Repot Aloe Vera
- Every 1-2 years: Aloe Vera plants generally need to be repotted every 1-2 years, depending on their growth rate and the size of the pot. If your Aloe Vera’s roots have outgrown its current container, it’s time to upgrade to a larger pot.
- Signs of root-bound growth: If you notice the roots growing out of the drainage holes or if the plant has stopped growing, these are signs that it’s time for a new pot. Also, if the plant looks top-heavy or the soil dries out too quickly, repotting might be necessary.
- Spring or early summer: The best time to repot Aloe Vera is during its active growing season, typically in the spring or early summer. This helps the plant adjust more easily to its new home.
2. How to Repot Aloe Vera
- Choose the right pot: Select a pot that is 1-2 inches larger in diameter than the current one. Ensure it has proper drainage holes.
- Prepare the new pot: Place a layer of small rocks or gravel at the bottom of the new pot for added drainage. Then, add a well-draining potting mix, such as a cactus or succulent mix.
- Remove the plant carefully: Gently remove the Aloe Vera from its old pot. Be careful not to damage the roots, especially if the plant is root-bound.
- Place in the new pot: Position the Aloe Vera in the center of the new pot. Fill around the roots with more potting mix, making sure the base of the plant sits slightly above the soil surface. Avoid burying the stem to prevent rot.
3. Aftercare
- Water lightly: After repotting, give your Aloe Vera a light watering. Allow the soil to dry completely before watering again to avoid overwatering.
- Allow the plant to settle: Place the repotted Aloe Vera in a bright, indirect light location for a few days to allow it to adjust to its new pot. Avoid direct sunlight immediately after repotting, as the plant may be stressed.
Repotting is a simple but essential task to ensure your Aloe Vera remains healthy and has enough space to grow. By paying attention to the signs and following the proper steps, your Aloe Vera will thrive for years to come.
Light and Placement Considerations for Aloe Vera
Aloe Vera thrives in bright, indirect light, making its placement within your home or garden an essential factor in its health. Proper lighting conditions will help the plant grow strong and maintain its vibrant green color. Here’s how to choose the best spot for your Aloe Vera:
1. Ideal Light Conditions
- Bright, indirect sunlight: Aloe Vera prefers bright, indirect light, such as the light coming through a window with sheer curtains. Direct sunlight can be too harsh and may cause the leaves to burn or turn brown.
- Up to 6 hours of sunlight: If possible, place your Aloe Vera in a spot where it can receive 4-6 hours of sunlight per day. A south or west-facing window is usually ideal.
- Avoid low-light areas: Aloe Vera doesn’t grow well in low-light conditions. If kept in a dimly lit area, it may become leggy and weak, and its growth may slow down significantly.
2. Temperature and Placement
- Warm environments: Aloe Vera is a tropical plant that thrives in warm temperatures between 60-80°F (15-27°C). Avoid placing your Aloe Vera in a location with cold drafts, such as near air conditioners or windows that are frequently opened during cold weather.
- Consistent temperature: Aloe Vera prefers a consistent temperature. Sudden temperature fluctuations or cold drafts can cause stress to the plant and affect its overall health.
3. Outdoor vs. Indoor Placement
- Outdoor placement: If you live in a warmer climate, Aloe Vera can be placed outdoors, provided it’s in a spot with plenty of light and is shielded from strong winds or extreme heat. Ensure the plant is protected from heavy rain, as it prefers dry conditions.
- Indoor placement: For indoor placement, a bright windowsill or shelf is perfect. If your home lacks sufficient sunlight, consider using a grow light to provide the necessary light for your Aloe Vera.
By choosing the right location with adequate light and temperature, you can help your Aloe Vera thrive and grow to its full potential. Proper placement ensures your plant receives the energy it needs without the stress of harsh conditions.
Watering Aloe Vera: Finding the Right Balance of Moisture
Watering Aloe Vera can be tricky, as it requires a delicate balance. Too much water can lead to root rot, while too little water can cause the plant to dry out and become unhealthy. Here are some essential tips for watering your Aloe Vera correctly:
1. Watering Frequency
- Allow soil to dry completely: Aloe Vera prefers the soil to dry out completely between waterings. Stick your finger about an inch into the soil—if it feels dry, it’s time to water. If it still feels moist, wait a few more days before checking again.
- Water less in winter: Aloe Vera’s growth slows down during the winter months, so it requires less water during this period. Cut back on watering and ensure the plant isn’t sitting in wet soil for long periods.
- Seasonal adjustments: During the warmer months when the plant is actively growing, you may need to water more frequently. In the cooler months, reduce watering as the plant’s growth slows down.
2. Proper Watering Technique
- Water thoroughly: When watering, make sure to water the plant thoroughly until excess water drains out from the bottom of the pot. This ensures the entire root system gets moisture.
- Avoid watering the leaves: Focus on watering the soil, not the leaves. Wet leaves can lead to fungal infections and other problems.
3. Signs of Overwatering and Underwatering
- Overwatering: If the Aloe Vera’s leaves become soft, mushy, or yellow, it’s likely a sign of overwatering. Root rot can set in, which is dangerous for the plant. To fix this, let the soil dry out and reduce watering.
- Underwatering: If the leaves start to wrinkle, curl, or turn brown at the tips, the plant might be underwatered. Aloe Vera will require more frequent watering to restore moisture levels.
By following these watering tips and adjusting your routine according to the season, you can keep your Aloe Vera healthy and prevent issues caused by improper moisture levels. Finding the right balance is key to a thriving Aloe Vera plant.
Handling Common Aloe Vera Pests and Problems
Aloe Vera is generally resilient and resistant to pests, but it can still face issues from time to time. Knowing how to recognize and handle these problems early will help ensure your plant remains healthy and thriving. Here are some common pests and issues to watch out for:
1. Pest Problems
- Aphids: These tiny pests suck sap from Aloe Vera, causing leaves to curl and become discolored. To get rid of aphids, spray the plant with a mixture of water and mild soap or neem oil. Wipe the leaves gently with a soft cloth to remove any pests.
- Mealybugs: Mealybugs appear as white, cotton-like clumps on the leaves or stem. They can cause yellowing and wilting. Treat them with rubbing alcohol or neem oil, applying directly to the affected areas.
- Spider Mites: These tiny arachnids leave behind a fine web and cause yellow specks on the leaves. Spider mites thrive in dry conditions, so increasing humidity can help deter them. Use insecticidal soap or neem oil to control their population.
2. Common Diseases
- Root Rot: The most common issue with Aloe Vera is root rot, caused by overwatering or poor drainage. If you notice your Aloe Vera’s leaves turning yellow or mushy, check the roots for rot. Trim off any affected roots, replace the soil, and use a pot with better drainage.
- Leaf Spot Disease: This fungal infection causes black or brown spots to appear on the leaves. It’s often caused by excessive moisture or poor air circulation. To treat it, remove the affected leaves and ensure the plant is in a dry, well-ventilated spot.
- Fungal Infections: Aloe Vera can develop fungal infections if the soil is too moist. To prevent this, ensure the pot has good drainage and avoid watering too frequently. If fungal infection occurs, remove the infected leaves and treat with a fungicide.
3. Stress Symptoms and Solutions
- Yellowing Leaves: Aloe Vera leaves turning yellow can indicate overwatering, underwatering, or a lack of sunlight. Check the soil moisture and adjust watering accordingly. Ensure the plant is getting enough indirect sunlight and avoid overexposure to direct sunlight.
- Browning Tips: The tips of Aloe Vera leaves may turn brown if the plant is exposed to extreme heat, low humidity, or insufficient water. Ensure it’s placed in a spot with stable temperature and humidity, and water it adequately when needed.
By identifying and addressing these common pests and issues promptly, you can maintain a healthy Aloe Vera plant. Regular care and observation will help you catch any problems before they become serious, ensuring your Aloe Vera thrives year-round.
Final Thoughts
Choosing the right pot for your Aloe Vera involves considering factors like size, drainage, and design to ensure its optimal growth. Along with proper watering, light, and pest management, these elements are key to keeping your Aloe Vera healthy and thriving. With the right care, your Aloe Vera will flourish, adding beauty and benefits to your home.

I’m Shofi, a passionate gardener and blogger. I have 10+ years of experience in gardening and hold certifications in horticulture and garden design. I share my knowledge and skills through my garden blog to inspire and educate others on the joys of gardening. I try to provide valuable information and create a community for gardeners of all levels to connect and learn. My ultimate goal is to inspire others to start their own gardens and connect with nature.